
Being completely obsessed with the film 'Frozen', Elise asked me if we could make an Elsa lantern.
"Why not?" I thought...
And here she is today outside her school, September 25th 2015, proudly holding the finished product:

If you want to know how we made it, I tried to document the steps:
What you will need:
- A picture of Elsa that you like
- 1 piece A4 paper 100gsm
- 1 piece glittery card, roughly 30cm square
- White craft glue that dries clear
- Pencil
- Waterproof pen
- Colouring pencils or glitter glue
- Pom poms, stickers, shapes to decorate Elsa's skirt
- Stapler
- A fake tealight (i.e. one that turns on with a battery)
- Some heavy duty tape
1. Find a picture of Elsa that you like online or from a book. Use fairly thick paper (I used 100gsm A4 and folded it in half - you'll see why later). Draw a pencil outline of Elsa on one half of the paper, then use a waterproof pen to go over the pencil. Don't worry about the back of the picture - we will come to that later.
2. Decorate the image. Elise and I used glitter glue because it's vibrant and fun to use but you could use whatever you like - coloured pencils, crayons, markers etc. I particularly like Elsa's lips on ours :)
3. Next cut around the 'front' image but don't cut around the edge where the paper fold is. Leave that intact; this will keep the top half of your lantern attached for as long as possible and it make it easier for you to draw the reverse image too. Let the glitter glue dry!
 |
| Steps 1-3 |
4. Next, turn the picture over and use the shape you have cut out to draw the reverse of the image. It doesn't have to be perfect remember. You'll see I have still left the bottom part of the picture (by her arm) intact - I haven't cut that bit out yet.
5. Decorate the reverse image!
 |
| Steps 4-5 |
6. Open the inside of the lantern up and use sticky tape to stick down a handle. I used a sequin ribbon because it can sit flat and also because the silver, sparkly effect sits well with Elsa and her frozen, magical theme. You could use string as well of course. Create a handle at the top and make sure you have plenty of string or ribbon left hanging at the bottom. This will help you fit the top of the lantern to the base later.
 |
| Step 6 |
7. Let's make the base. We used a big square piece of glittery blue card - this would become Elsa's skirt. The card I used measured about 30cm square and this worked well. Turn the card around into a cone shape to create a 'waist' and a skirt 'hem'. Use a stapler to fix it together. Then cellotape the inside seam to give some extra strength.
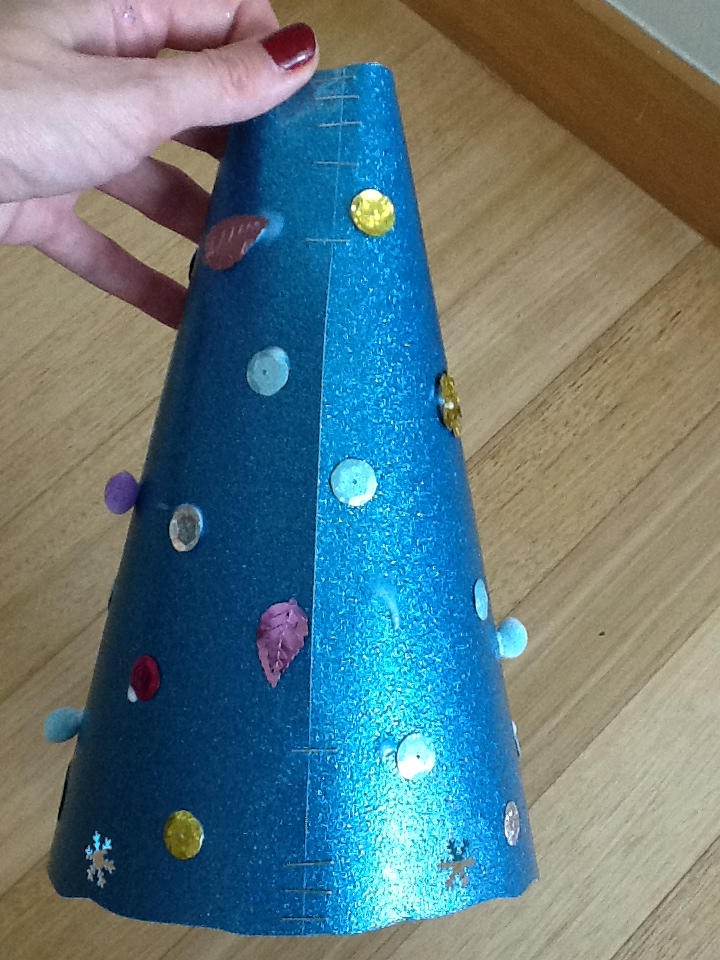 |
| Step 7 |
 |
| Step 8 |
9. Once your two pieces are completely dry (you don't want all your pom poms falling off!) you are ready to attach the top of the lantern to the base.
Slide the 'waist' of Elsa into the skirt, using the ribbon to help you. Once it is in place you can cellotape the ribbon to the inside of the skirt to secure it. This means when Elise holds her lantern by its silver handle, it is attached through the whole lantern (it is stuck to the inside of the Elsa image and to the skirt base) which makes for a robust lantern!
10. Get your tea light and slide it up into the 'waistline' of the lantern. You might have to switch it on from the outset! Tape it along its base to the inside of the card 'skirt' and hei presto, you have a glowing lantern!
 |
| Step 10 |
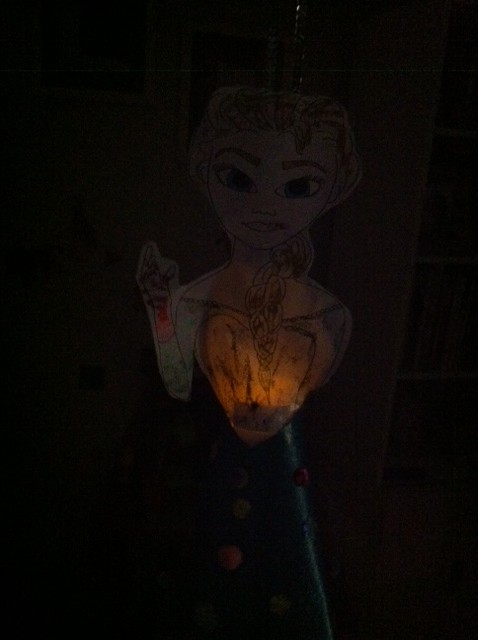
We tried it out in the dark to see how effective Elise's lantern really was:
I thought I'd share some photos from the Lantern Festival celebration today at Elise's school. Here are the teachers performing a dance:


And Elise enjoying a Moon Cake in the car on her way home from school!

Love and hugs,
Rebecca and Elise x
No comments:
Post a Comment